| ||
|
|
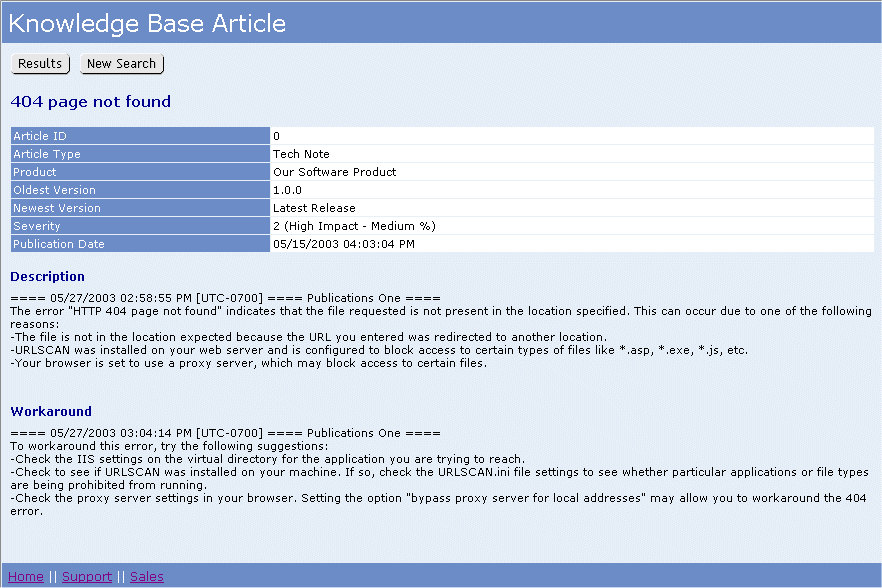
The Item Page is the page that will display the information within a Knowledge Base article. Various aspects of the item Page can be customized as described below.
Click on the Header or Footer button to the left of Item Page on the Knowledge Base Configurations Page to customize the Header or Footer section of the Item Page. You can enter your own custom HTML into the text box provided. Click OK to save your changes. Please do not enter any header tags into this area. Some examples of header tags are <HTML>, </HTML>, <BODY>, </BODY>.
The contents of the Item Page can be customized to determine which fields will displayed in the sections of each article. To customize the contents of the Item Page, click on the Contents button to the left of the Item Page on the Knowledge Base Configurations Page.
To customize the options on the Contents page:
Click on the Edit button to the left of Title to select a field that will be used as the title for each article. All fields that are a Text type field will be available to be selected as the Article Title. Information on adding a Text type field to the database can be found in the Customizing the Data Record Help section. Click OK to save your selection.
Click on the Edit button to the left of Summary to select the fields that will be displayed in the Summary section of the article. All fields in use in the Knowledge Base workgroup except fields that BigText type fields will be available to be displayed in the Summary section. Fields listed in the Selected Items column are the fields that will appear in the Summary section.
To add a field to the Selected Items column:
To remove a fields from the Selected Items column:
Click on the Edit button to the left of Body to select which fields will be displayed in the Body section of each Knowledge Base article. All fields in use in the Knowledge Base workgroup will be available to be selected for the Body section. Fields listed in the Selected Items column are the fields which will appear in the Body section.
To add a field to the Selected Items column:
To remove a field from the Selected Items column:
You can choose to display fields that are BigText (TextArea) type fields as Text or HTML. By default, the fields will be displayed as Text. To display the fields as HTML, check the box called Display TextArea Fields as HTML. Click OK to save this change.
A style sheet is used to determine the look and feel of the Item Page. You can use your own style sheet by placing a copy of your style sheet into the Styles directory of your workgroup's Knowledge Base files. The directory can be found at:
<installation directory>/workgroup/KB/Styles
where <installation directory> is the location where you installed your ProblemTracker files. By default, the <installation directory> is at C:\Inetpub\wwwroot\ProblemTracker and workgroup is the name of the workgroup used as Knowledge Base.
Click on the Style button to the left of the Item Page to specify the name of your customized style sheet. In the Style Sheet File Name field, enter the name of your style sheet file in the format FileName.Extension as in the example KBStyle.css, which is the style sheet used by default.
Check the box for the option Apply to all pages to apply the style sheet entered in the Style Sheet File Name field to all pages related to the Knowledge Base. Enabling this option will overwrite any other style sheets specified in the Style section for the Search and Results pages.
Click OK to save your selections.
 NetResults ProblemTracker

